Thursday, December 03, 2015
Project Video #2: Engine/Shaft Alignment
So, I started making videos primarily because I wanted to learn how to use Premiere. Now that's led to another Alberg 30 Project video. If there's an interest in these things, I just might keep them coming - provided I have new content ;).
Friday, November 27, 2015
Slow day: Making videos
Sort of a slow, relaxing day around here, so I decided to put together a brief video highlighting some of my progress on Tradewinds. Not sure that this kind of video is my thing, but I thought I'd give it a go. I always enjoy boat videos, especially when winter rolls around. Maybe some others do, too. :)
By the way, it may sound odd to some that I bought this boat 10 years ago and didn't do much with it during that time. I suppose it is a little silly to buy a boat and let it sit, but Tradewinds was purchased as a project; we already have Ariel, a Cape Dory 36, which I've been sailing and maintaining for over 12 years now. I imagine I would have been moving a lot faster on Tradewinds had we not had Ariel. Owning and maintaining one boat is enough work, so it's not too surprising that the project languished. I started it up in earnest this summer for the reason(s) mentioned in the video.
By the way, it may sound odd to some that I bought this boat 10 years ago and didn't do much with it during that time. I suppose it is a little silly to buy a boat and let it sit, but Tradewinds was purchased as a project; we already have Ariel, a Cape Dory 36, which I've been sailing and maintaining for over 12 years now. I imagine I would have been moving a lot faster on Tradewinds had we not had Ariel. Owning and maintaining one boat is enough work, so it's not too surprising that the project languished. I started it up in earnest this summer for the reason(s) mentioned in the video.
Sunday, November 22, 2015
Sta-Lok Fittings For Sale
I acquired a lot of new Sta-Lok fittings, many of which I used for re-rigging Ariel, our Cape Dory 36. I'll be keeping a few others for re-rigging the Alberg 30, when the time comes. Here's a list of what I have available. Feel free to make an offer on the lot or on a partial lot.
5/32" wire:

6 qty - Terminal Studs with 5/16" threads - $20.00/each (Retail: $28.00/each)
9/32" wire:
12 qty - Fork with 7/16" pin - 45.00/each (Retail: $67.00/each)
6 qty - Eye with 1/2" pin hole - 35.00/each (Retail: $44.00/each)
8 qty - Terminal Stud w/ 1/2" thread - $45.00/each (Retail: $53.00/each)
5/16" wire:
12 qty - Fork with 1/2" pin - $64.00/each (Retail: $80.00/each)
7 qty - Eye with 5/8" pin hole - $45.00/each (Retail: $66.00/each)
10 qty - Terminal Stud w/ 1/2" thread - 50.00/each (Retail: $62.00)
3/8" wire: (CD36 Bobstay, by the way)
14 qty - Fork with 5/8" pin - $76.00/each (Retail: $100.00)
2 qty - Eye with 5/8" pin hole - $67.00/each (Retail: $81.00)
8 qty - Terminal Stud w/ 5/8" thread - $70.00 (Retail: $89.00)
And just in case you have 7/16" rigging :):
7/16" wire Eye with with 3/4" pin hole - $100.00 (Retail: $200.00)
5/32" wire:

6 qty - Terminal Studs with 5/16" threads - $20.00/each (Retail: $28.00/each)
9/32" wire:
 |
| This is the collection of 9/32" fittings, worth over $1500 in fittings. Buy the whole lot of 9/32" fittings for $750 + Shipping. |
12 qty - Fork with 7/16" pin - 45.00/each (Retail: $67.00/each)
6 qty - Eye with 1/2" pin hole - 35.00/each (Retail: $44.00/each)
8 qty - Terminal Stud w/ 1/2" thread - $45.00/each (Retail: $53.00/each)
5/16" wire:
12 qty - Fork with 1/2" pin - $64.00/each (Retail: $80.00/each)
7 qty - Eye with 5/8" pin hole - $45.00/each (Retail: $66.00/each)
10 qty - Terminal Stud w/ 1/2" thread - 50.00/each (Retail: $62.00)
3/8" wire: (CD36 Bobstay, by the way)
14 qty - Fork with 5/8" pin - $76.00/each (Retail: $100.00)
2 qty - Eye with 5/8" pin hole - $67.00/each (Retail: $81.00)
8 qty - Terminal Stud w/ 5/8" thread - $70.00 (Retail: $89.00)
And just in case you have 7/16" rigging :):
7/16" wire Eye with with 3/4" pin hole - $100.00 (Retail: $200.00)
Cold, snowy weather projects
With our first snowfall of the season this weekend, I thought it was a good time to drag a bucket of boat parts in from the garage and do a little maintenance. I began with the old Barlow 22 winches, disassembling them and giving the innards a good scrubbing with kerosene. They cleaned up nicely and now the pawls are making a nice, crisp clicking sound - as they should.

Little projects like this one aren't nearly as satisfying as the bigger jobs that get the boat closer to launch, but they are jobs that will need to be completed at some point, so they might as well get done now.

Tuesday, November 17, 2015
What's happening
Things have been so busy at work that I haven't had time to move the project along. I did install the original propeller shaft on Sunday, thinking that I would mark the locations for the engine mounts, then drill and tap them. With the shaft attached, I tweaked the engine position a bit to get the shaft centered in the deadwood. Alignment looked very good, but as I began to think about finalizing the engine position I got nervous because I have no guarantee that the shaft is true and properly positioned in the coupling. Rather than take the gamble, I decided to begin the process of getting a new shaft and coupling so I can be confident that the engine position is as good as it can be.
At this point I haven't heard back from a Michigan propeller shaft shop, so I've contacted Hamilton Marine and begun working with them for an estimate. This evening I drew up some of the shaft/coupling details to get the ball rolling:

At this point I haven't heard back from a Michigan propeller shaft shop, so I've contacted Hamilton Marine and begun working with them for an estimate. This evening I drew up some of the shaft/coupling details to get the ball rolling:

Monday, November 02, 2015
Engine trial fit
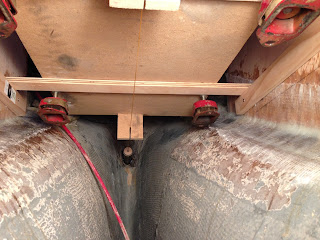
So I moved the engine from the cockpit to the new foundations to see how it's going to fit. I'm pleased with the fit, but it's clear that there was a discrepancy between the technical drawings/measurements and the actual engine. The rear mounts are about a 1/2" farther aft than the mockup. I don't think that will be an issue, but the rear part of the foundation has minimal thickness due to the angle, and I'd really like to get at least 1" of thread into the foundations at the aftermost mounting hole. Hopefully I'll be able to do that.


A peek through the stern tube revealed the center of the output coupling, so I'm hoping that alignment is pretty good. Since my stern tube will be permanently fixed in place with the aid of the prop shaft coupled to the engine, alignment shouldn't be too much of an issue.
The only issue that will need correction - at this point, at least - is a tight spot between two cooling hoses and the foundations. The hoses rub the foundations and will quickly chafe through with the engine's vibration, so I'm going to have to grind out a portion of the foundations port and starboard to give the hoses more clearance. I'm not too keen on messing up my fiberglassing job, but I guess there's no other choice.
With regard to building the engine box, I was hoping that the engine would sit far enough aft that I'd be able to slope the front of the engine compartment aft a bit. I'm not sure just how much slope I'll be able to get at this point, but it's not looking like much. Aesthetically and practically, it would be good to have a gentle slope for the ladder to follow and to free up room in the "galley."
Sunday, November 01, 2015
Engine foundations capped and glassed
With temperatures in the high 50s for the day and creeping into the 60s for the next week, I made it my goal to get the 1/2" G10 caps epoxied atop the engine foundations and covered in glass.
I began by water washing the previous round of fiberglass. I then trimmed the rough edges where fiberglass ran off the foundations and gave everything a quick sanding before cleaning up and wiping the surfaces with acetone. Once that was done I cut the 3" wide 1/2" G10 strips to length, sanded all surfaces with 60 grit, beveled the top edges, and trimmed a corner off of each to fit the angle of the hull. I then applied a thin layer of neat epoxy to the foundations before setting both strips in a bed of thickened epoxy, making sure that epoxy oozed out of the edges. I temporarily screwed both strips to the foundations while the epoxy gelled and used a scraper to form the excess epoxy into a sort of fillet that provided a smooth transition between the foundation and the G10 strips.
I cut several pieces of biaxial cloth and plain woven cloth while the epoxy partially cured, then removed the screws and covered both strips and the front edges of the foundations with biaxial and a final layer of cloth to give it a smoother finish.

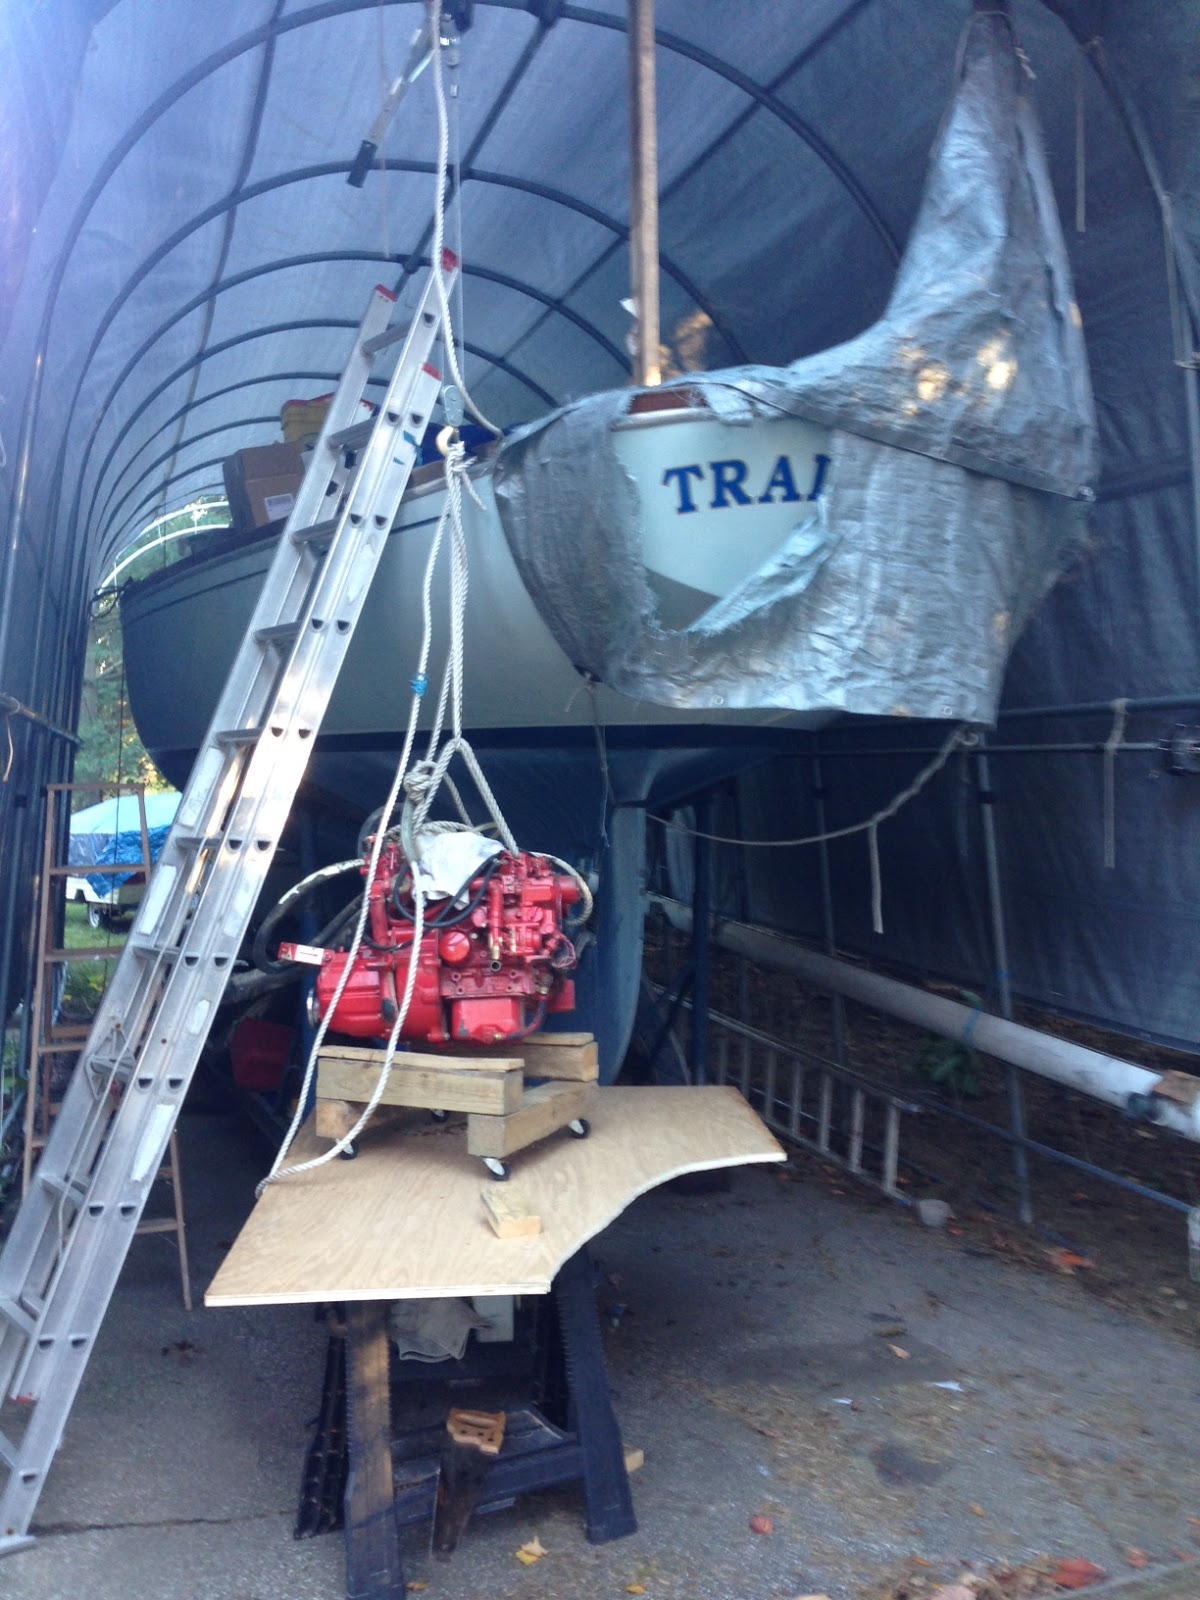
 While the epoxy cured, I decided it was time to get the engine back aboard so I can eventually set it in place and install the stern tube. Additionally, I'd like to have the engine in place while I create the engine box to ensure that everything is going to fit. My rough measurements suggest it will, but I'd like to be sure about the sloping forward edge of the engine compartment, so that means having the engine positioned first.
Although the little Westerbeke 20B Two only weighs about 225, it's a heavy little booger. I used a little trailer and my riding mower to get the engine from the garage to the boat, then rigged a come along to the boat shed (after adding additional support to the structure) and hoisted the thing aboard, setting it back atop its wheeled cart for the time being. Once the beds are cured, sanded and painted, I'll set the engine in place and begin constructing the engine box and setting the stern tube.


I began by water washing the previous round of fiberglass. I then trimmed the rough edges where fiberglass ran off the foundations and gave everything a quick sanding before cleaning up and wiping the surfaces with acetone. Once that was done I cut the 3" wide 1/2" G10 strips to length, sanded all surfaces with 60 grit, beveled the top edges, and trimmed a corner off of each to fit the angle of the hull. I then applied a thin layer of neat epoxy to the foundations before setting both strips in a bed of thickened epoxy, making sure that epoxy oozed out of the edges. I temporarily screwed both strips to the foundations while the epoxy gelled and used a scraper to form the excess epoxy into a sort of fillet that provided a smooth transition between the foundation and the G10 strips.
I cut several pieces of biaxial cloth and plain woven cloth while the epoxy partially cured, then removed the screws and covered both strips and the front edges of the foundations with biaxial and a final layer of cloth to give it a smoother finish.


Although the little Westerbeke 20B Two only weighs about 225, it's a heavy little booger. I used a little trailer and my riding mower to get the engine from the garage to the boat, then rigged a come along to the boat shed (after adding additional support to the structure) and hoisted the thing aboard, setting it back atop its wheeled cart for the time being. Once the beds are cured, sanded and painted, I'll set the engine in place and begin constructing the engine box and setting the stern tube.


Tuesday, October 27, 2015
Engine foundations and filling holes
Sadly, there hasn't been much progress now that I'm eyeball deep at work. What time I've had has been dedicated to hauling and winterizing Ariel.


I did, however, manage yesterday to get a final layer of biaxial cloth on the engine foundations, despite temps barely reaching the high 50s. Early in the morning I set up two heaters inside the boat to raise the temp. Around 1, the surfaces were about 65 degrees, so I wet out cloth and glassed the beds.
The weather is going to shut me down soon, so I took advantage of the temp and glassed over two old thru hull holes that I'd filled previously with thickened epoxy. And that was it for the day.
Two strips of G10 arrived late in the day. Those strips will be epoxied to the tops of the engine foundations and glassed over. I'll get to that as soon as time and temp allow. Until then, I work - and wait.
And if anyone is interested in what West Systems has to say about epoxying in colder temperatures, check out this link: Cold Temperature Bonding. Apparently West System fast hardener can be good to 35 degrees. I feel better about the work I did yesterday knowing that


 |
| One of my little helpers helping me with our littlest boat. |
I did, however, manage yesterday to get a final layer of biaxial cloth on the engine foundations, despite temps barely reaching the high 50s. Early in the morning I set up two heaters inside the boat to raise the temp. Around 1, the surfaces were about 65 degrees, so I wet out cloth and glassed the beds.
The weather is going to shut me down soon, so I took advantage of the temp and glassed over two old thru hull holes that I'd filled previously with thickened epoxy. And that was it for the day.
Two strips of G10 arrived late in the day. Those strips will be epoxied to the tops of the engine foundations and glassed over. I'll get to that as soon as time and temp allow. Until then, I work - and wait.
And if anyone is interested in what West Systems has to say about epoxying in colder temperatures, check out this link: Cold Temperature Bonding. Apparently West System fast hardener can be good to 35 degrees. I feel better about the work I did yesterday knowing that
Monday, October 12, 2015
Engine foundations glassed
I began this morning by giving the epoxy a water wash, then sanded the area to prepare for fiberglassing. I prepared the area by wiping it down with acetone, then used plastic pattern material to create patterns for the fiberglass cloth. I transferred the patterns to biaxial and cut enough to apply two layers to both the inside and outside of the foundations. The process went well and I'm pleased to have the foundations glassed in place. A fellow Alberg-er has picked up some 1/2" G10 strips for me that I'll epoxy on top of the foundations and then glass them in place. Things are moving along.


 |
| Cleaned and ready for glass |
 |
| Two layers of glass inside and out |


Sunday, October 11, 2015
Engine foundations in
I swear those boat repair/restoration specialists make it look A LOT easier! After a whole bunch of sanding and cutting - and head scratching - I got the two engine foundation blanks shaped and ready to epoxy in place.

I started the day by cutting the 12"x48" laminated plywood for the engine foundations in half, thinking that I'd get a blank out of each 12"x24" piece. After making all of the necessary cut marks, I trimmed the piece to size and realized that the geometry was such that I could actually get two foundations out of one 12"x24" section. I was a little disappointed that I'd cut up more of my marine ply than necessary, but at the same time I was reassured to know that I had enough to make a second set if I managed to make a serious mistake with the first go.
With my first blank cut to the approximate size, I trimmed and sanded as necessary to get the piece to fit well with the contours of the hull. Once the port foundation was fitting nicely, I repeated the procedure on the starboard side. Both foundations trimmed, I coated the exposed edges of the plywood with neat epoxy before setting the foundations in a bed of thickened epoxy.
I left the foundations to cure overnight. Tomorrow I'm hoping to get a few layers of fiberglass on them.
The cross braces atop the engine foundations provided a guide and secure mounting location during epoxying.

Monday, October 05, 2015
Galley tops
Work's getting busier and busier, leaving little time for hobbies. I managed a bit of free time and cut two pieces for the galley areas on either side of the engine box. Both pieces slid into place, but I need to trim just a little from each to get the edges to line up with the existing bulkheads - nothing major, but just shy of flush.


The engine foundation laminations are complete. I need to trim the blanks to their rough size. Hopefully I can manage to get them glassed in before the weather gets too cold! Things get chilly around here pretty soon.
Sunday, September 27, 2015
Painting, filling holes, laminating engine foundations
I began laminating my 1/2" Hydrotek for the engine foundations Friday before heading off to Ohio for the weekend. I cut the sheet into six 12"x48" strips and managed to get two glued up before it was time to get on the road.
This morning I added two more strips to the lamination, then quit before running out of epoxy (gallon #3). I clamped and secured the laminations for curing, using an assortment of items from the garage (yes, I think the leaf spring is a nice touch, too!).

Last week I'd installed the latches for the settee back hatches.

Today I removed them to give the settees a light sanding and the final coat of paint. I also lightly sanded the head compartment and hanging locker before giving those areas their final coat of paint as well.
I mixed up a batch of thickened epoxy and filled the two thru-hull holes in the head compartment. I'll reuse the larger one with a smaller seacock for the water intake, but the smaller hole will stay filled and fiberglassed. Overboard discharge is prohibited in the Great Lakes, so rather than fuss with an overboard discharge system that can be locked, etc, I opted to eliminate the discharge; she'll have a waste pump out and that's it.


Not a bunch of progress, but I'm inching forward. I'll pick up another gallon of epoxy tomorrow and finish the laminations for the engine foundations.
Tuesday, September 22, 2015
Yet more paint
Yesterday the head cabinet/bulkheads and settees received their first coat of paint. And tonight they received a second coat. I did run out of paint, however, before applying the second coat to the starboard settee bottom.
Nothing too exciting to report about the painting. It happened. It is nice to be one step closer to having her saloon looking like a saloon again, though.


I dragged the trailer to work this morning and headed to South Bend after school to pick up a sheet of 1/2" Hydrotek for the engine foundations. I'll cut and glue those up tomorrow.
Sunday, September 20, 2015
Paint and 'glass
While waiting for the plywood I need for the engine foundations, I decided to move forward with what I can. In little chunks of time over the last week, I painted the areas of shelving above/behind the settees, the head locker, hanging locker top, and the galley. All areas received two coats.


Today I spent an hour or so fiberglassing the head locker face and the settee tops/backs - oh, and the second shelf that I ended up adding to the lower part of the hanging locker. The tabbing ties the structures together, strengthening and securing them.


In the areas of the settees, I added a top layer of cloth to provide a smoother finish than the biaxial under it and to protect the cushions from snags and scratches.


 |
| Hanging locker with only one coat of paint |
Today I spent an hour or so fiberglassing the head locker face and the settee tops/backs - oh, and the second shelf that I ended up adding to the lower part of the hanging locker. The tabbing ties the structures together, strengthening and securing them.


In the areas of the settees, I added a top layer of cloth to provide a smoother finish than the biaxial under it and to protect the cushions from snags and scratches.


Tuesday, September 15, 2015
Round Two
I just wasn't satisfied with the first engine position mockup. Although the angle of the engine was well within tolerances, I wasn't getting enough room under the aft mounts to allow sufficient engine foundation and eventual thread purchase for the bolts. After making sure I was ready to start over, I did just that.
I increased the angle of the engine (and stern tube) by 1.5*, transferred my new angle to the sides of the engine box, and installed the cleats and cross pieces to support my engine template. Not surprisingly, the practice of the first attempt improved my second attempt. All of the angles and clearances seem better. I'm still 3.3* below my max, and the stern tube is exiting the deadwood at a right angle - or very nearly. Additionally, the engine isn't so far forward that it's going to encroach on the galley space.


I collected my rough measurements for the engine foundations; now I need to purchase the material to build them.
Sunday, September 13, 2015
Engine bed prep
With an hour or so free this evening, I began feeling my way through the initial stages of the engine installation. I honestly have very little clue what I'm doing. Following encouragement and some expertise from a knowledgeable source, I proceeded with my plan to use a length of the stern tube material I'd purchased, capped with two wooden plugs, to begin determining the centerline of the prop shaft and engine. The picture below doesn't show the string rigged through the center of the plug, but it provides an idea of what I did.


The idea is to secure a string in the center of the wooden plug, run the string through the stern tube and out the center of a matching wooden plug on the forward end of the tube. The string is then run down the centerline of the boat, drawn taut, and secured. Having established the centerline, the tube and string are then adjusted vertically to achieve an angle that does not exceed the recommended angle listed for the engine, a Westerbeke 20B (which happens to be 14 degrees) - all the while adding shims and hot glue to hold the stern tube in place.
Once I'd experimented with a couple of angles and my engine mockup, I set the string to an angle of just under 10 degrees - 9.2, actually - that seemed to give the rear engine mounts a little more room at the narrow portion of the aft bilge. I transferred the pitch and level of the string to the engine box panels, then drew a line on each to indicate the attachment point for cleats that would support the engine mockup while I took measurements for the engine beds.


With the cleats mounted, I rested the template on two 1/2" pieces of plywood running laterally and eyeballed the arrangement. Alignment looks pretty good, but I'm concerned that the rear engine mounts are too close to the hull; I need enough material under them to thread a mounting bolt into. I could get more room under them by adjusting them up, but I centered all of the mounts so that I'd have adjustment room up and down. I don't want to lose that for fine tuning. The other option is to move the whole engine forward, but I don't want to do that either because the engine will already be pretty far forward in the compartment. Anyway, feeling a bit hurried (and uncertain), I decided it was time to quit and let things percolate. I'll take a fresh look at it later this week and see if I've arrived at a clearer idea of what I need to do.

Friday, September 11, 2015
Settee hatches and head
Not a whole lot to report, but there has been some progress. I finished cutting and installing cleats in the settee backs for the two access hatches. I made a simple cleat arrangement to hold the bottom of each hatch in place, and I'll add a latch of some sort at the top to keep the hatches from falling forward.

In the head compartment I installed the face for the two shelves, securing it to the cleats on either side with ss screws.


I'll fiberglass the top and bottom when I do another round of glassing.
I'm going to reuse the original settee cabinet fronts, so I fitted the fronts on both sides. The starboard side is entirely original - and a little beat up. I'll refinish it at some point, and I think I'll do something to cover the holes in the masonite fronts (they're kinda ugly).

The front for the port side was cut by a PO at some point, leaving two doors and part of another. I trimmed the remaining legs flush and fastened the front to the shelf.


I used a 3/4" piece of teak plywood cut to size to fill the area. I was thinking that I could stain the teak to match the old mahogany, but at this point I'm thinking I might paint it white and trim it in mahogany. That decision is far down the road, though.

I had a few minutes today, so I gave my last round of tabbing a quick sanding and vacuumed the area.
 |
| A simple cleat locks the bottom in place. |

In the head compartment I installed the face for the two shelves, securing it to the cleats on either side with ss screws.


I'll fiberglass the top and bottom when I do another round of glassing.
I'm going to reuse the original settee cabinet fronts, so I fitted the fronts on both sides. The starboard side is entirely original - and a little beat up. I'll refinish it at some point, and I think I'll do something to cover the holes in the masonite fronts (they're kinda ugly).

The front for the port side was cut by a PO at some point, leaving two doors and part of another. I trimmed the remaining legs flush and fastened the front to the shelf.


I think that piece of ply might make a good location for a VHF radio or the electrical panel. At this point I'm not planning on installing another door there.
I had a few minutes today, so I gave my last round of tabbing a quick sanding and vacuumed the area.
Subscribe to:
Posts (Atom)