Thursday, July 05, 2012

Bilge and cutless bearing

Having a lot of other stuff to do - canvas jobs, prepping Ariel for launch and replacing her leaking diesel tank, spending time with my two boys, and, oh yeah, my full-time job - means not much stuff gets done on the Alberg 30.  I did, however, spend a couple hours doing what I seem to do best: take things apart (let's hope I can manage to get those things back together eventually).

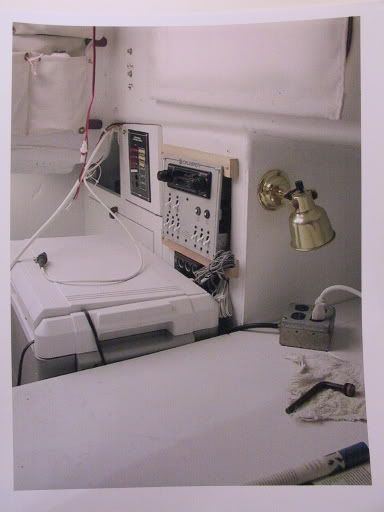
There were a couple tasks that I wanted to get done: 1) clean out the bilge and seal the exposed cement (or whatever it is) that fills the area at the aft end of the bilge; 2) remove the ridiculous web of wiring and the offensive Celebrity ski boat electrical panel; 3) remove the old engine mounts in preparation for new engine beds.
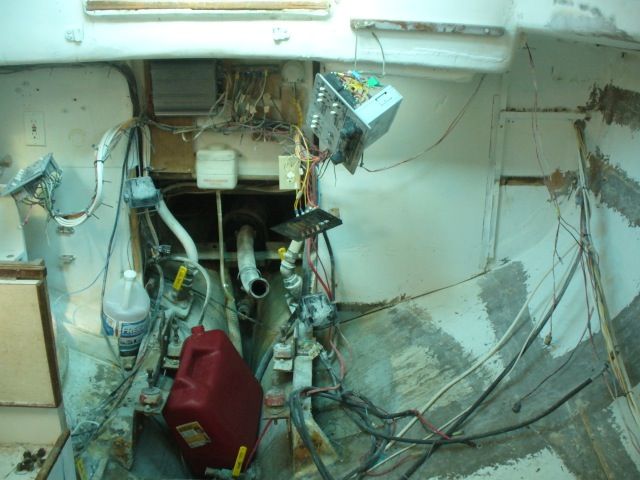
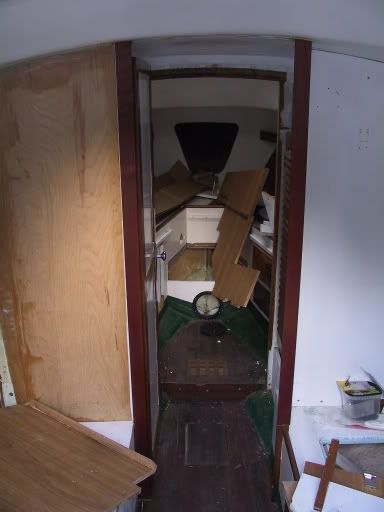
Here you can see the DC panel with stereo and a dangling cheap-o accessory panel hanging to port, and the AC panel to starboard.  At the center are several blocks of wood (secured with a dozen or more screws through the cockpit footwell) to which are fastened an amp for the stereo and a buss or two.

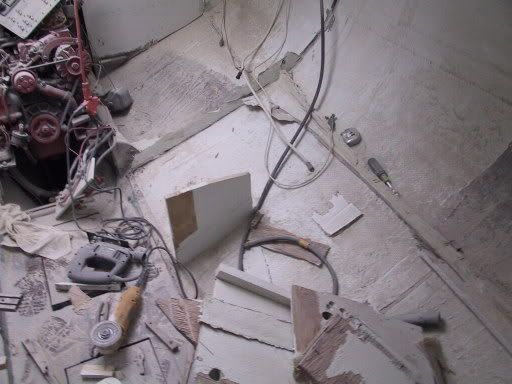
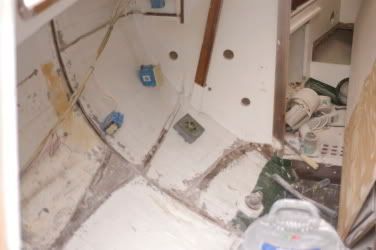
I began by stripping all the bits and pieces of wiring out of the boat.  Most of the wiring is newer, so I did what I could to preserve lengths of wire that I might be able to reuse.  I am amazed that the PO thought it was necessary to have five separate AC outlets located within such a small cabin.  Ariel, our CD36, has three AC outlets, and never have we wanted for more.  Of course, the number of outlets in the A30 should come as no surprise given all the other "improvements."

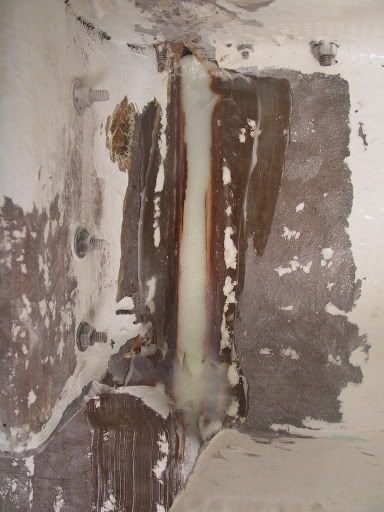
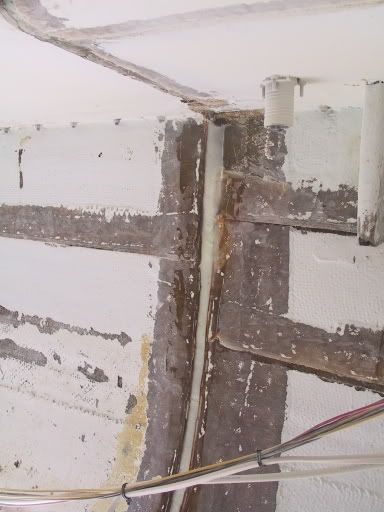
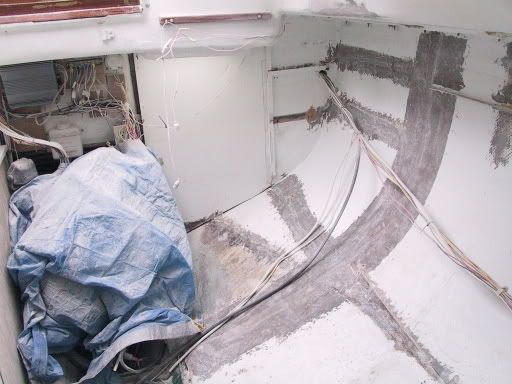
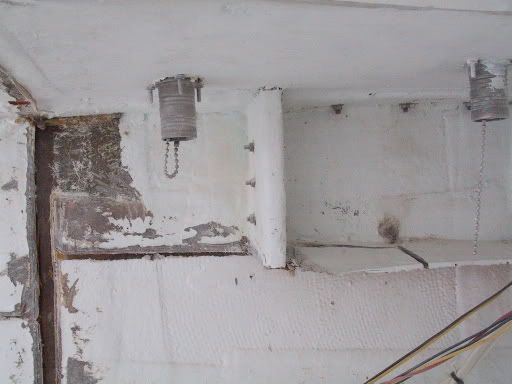
With all the wiring stripped out of the boat and organized, I cleaned up the area and vacuumed out the bilge.  In the area just forward of the aftermost floor, there was a piece of exposed ballast and aft of it a cement-like material intended, I suppose, to keep the ballast in place and the fill the aft area of the keel.
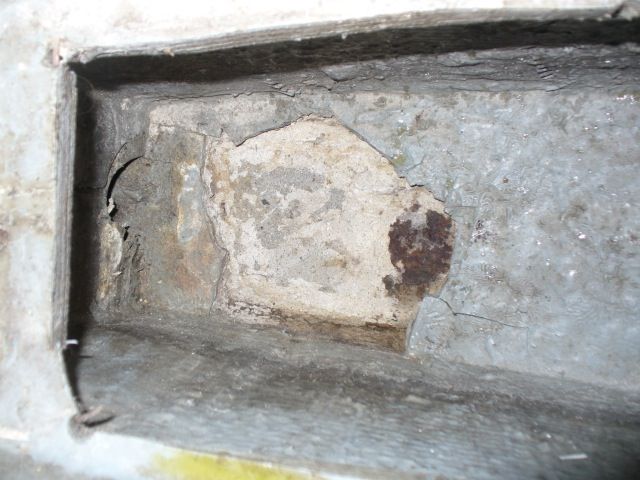
The rusted area of exposed ballast is visible at right.
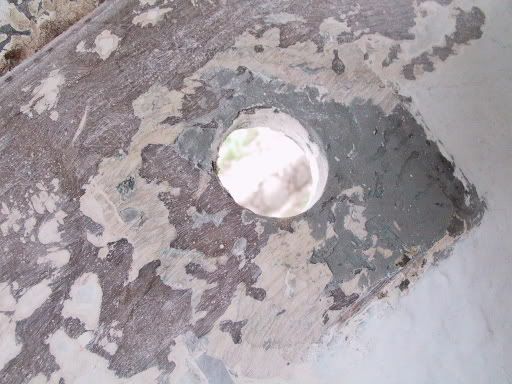
Water had apparently leaked through this area for some time because a previous owner installed a drain in the bottom of the keel just aft of this position.  Once I'd vacuumed the junk out of the bilge, I noticed a hole had been drilled down through the cement, and after rodding it out with a screw driver I was able to see through to the drain in the keel.  I'm not too keen on having a exposed fitting mounted to the bottom of the keel where it could be damaged or ripped loose in a grounding, so I will eventually remove it and install a garboard drain even with the bilge bottom.
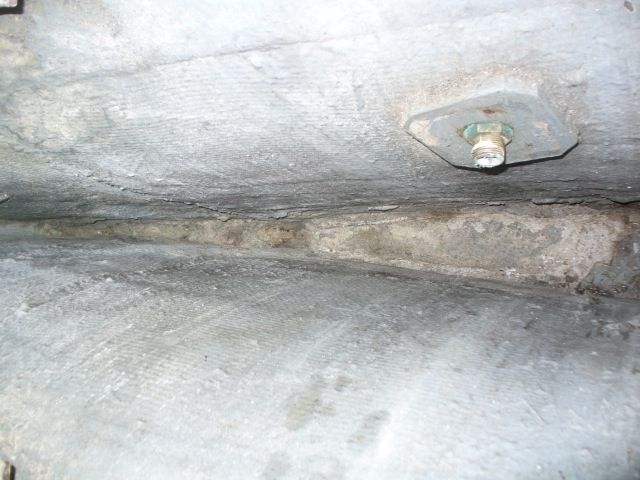


After portion of the bilge showing the exposed material.


I mixed up some epoxy and applied a thin coating over the exposed material in the keel as an initial seal.  Once it was tacky, I mixed up epoxy thickened with colloidal silica and used it to fill in some of the larger gaps.  Atop that I laid a layer of fiberglass cloth.  Although that provided some measure of protection to that area, it left an irregularly shaped bilge, so I cut a couple pieces of blue DOW styrofoam board to fit and fill the bottom of the bilge, creating a flat surface that sloped slightly forward from the aft portion of the bilge.  Eventually that foam board will receive a layer of 1708 biaxial cloth that will become the new bilge bottom, sealing the area beneath.

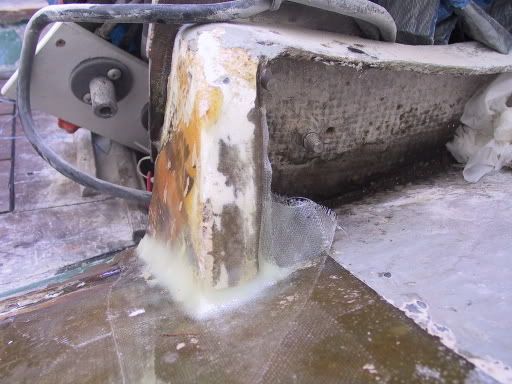
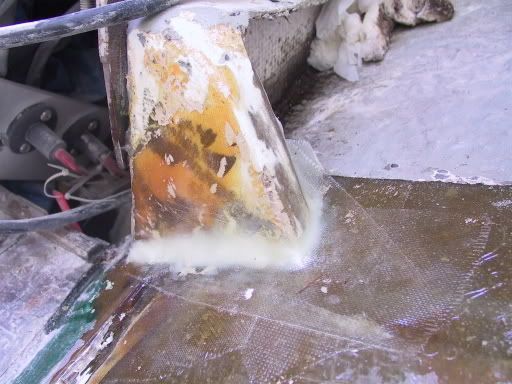
It was too hot to continue work in the boat, so I turned my attention to removing the old, worn cutless bearing as part of prepping for reinstalling the engine.  The cutless bearing housing screws onto the molded-in stern tube.  Removal requires removing the two bolts that are threaded into the keel deadwood, then unscrewing the cutless bearing housing.  Unfortunately, it appears that I may have partially "unscrewed" the stern tube as I was attempting to remove the housing.
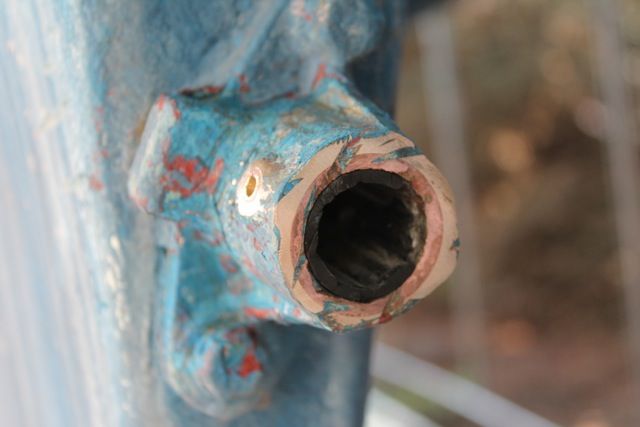
The two bolts that secure the housing are visible in the photo to the left.  The aftermost portion of the housing also shows the cutless bearing sleeve pressed into the housing.  In this case, it is also evident that a previous owner got a little carried away with a grinder or reciprocating saw and cut the housing and the bearing - presumably because the bearing stood proud of the housing.  Why they didn't just cut the bearing flush without damaging the housing is a mystery.

Two set screws on either side of the housing are used to lock the cutless bearing in place.  I was able to remove the starboard screw easily, but the port screw crumbled when I tried to turn it.
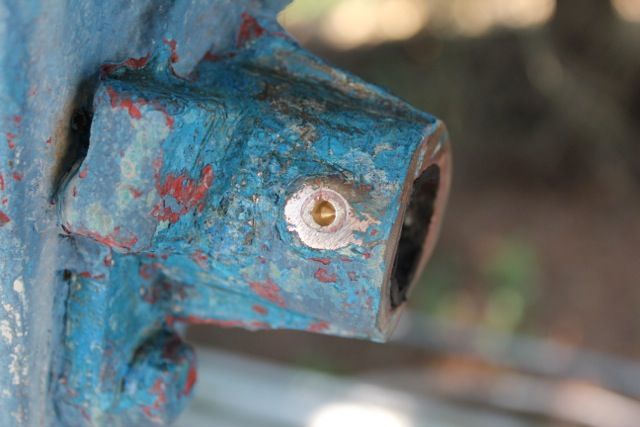
While I was operating under the delusion of removing the cutless bearing with the housing still attached to the boat, I decided to drill out the set screw - visible at left.  Even with both set screws removed, there was no easy way to remove the cutless bearing.  I even tried cutting some reliefs in the bearing sleeve, but there was no way to pry it loose without damaging the housing further.
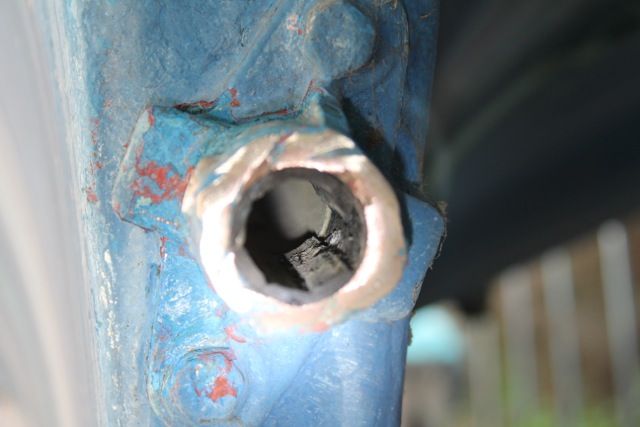
The threaded portion of the stern tube that attaches to the bearing housing is visible where a portion of the rubber bearing has been removed.
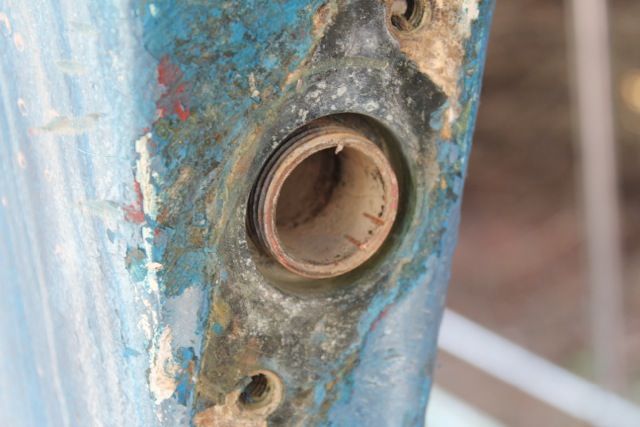
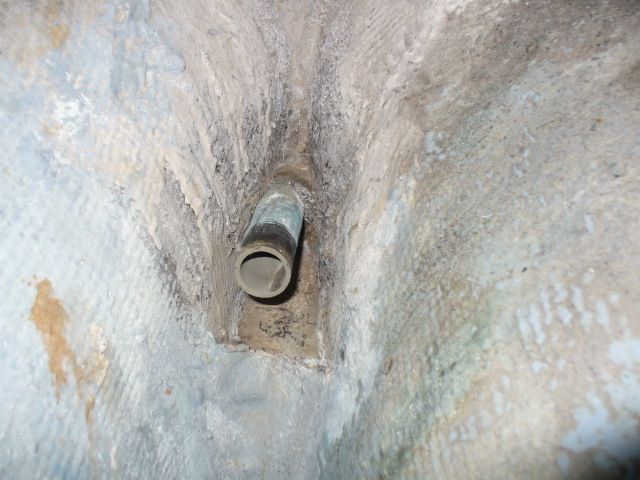
And here is the threaded stern tube with the bearing housing removed.  Since I fear the stern tube "unscrewed" partially during removal of the housing, the next step is to remove the stern tube and prepare it and the housing, with a new cutless bearing, for reinstallation in a bed of sealant.  The important bit is to ensure that all of these bits line up well with the new engine mounts, etc.  That process is something I've only read about, so I'll be feeling my way along - carefully.


The stern tube


Timing for all of this has worked out quite well since Jimmy of SV Cookie is working through some of the same issues.  I've already sought his input on some of this and appreciate his contributions.
Thursday, November 24, 2011

Removing the engine

Several weeks ago I made the decision to remove the engine so, as I had time, I began removing bits and pieces here and there in preparation. I began with the shaft coupling bolts, expecting them to be not just difficult to reach but firmly stuck. It turns out they were barely tight, and although a tad difficult to reach, they came out easily.

I also figured that the prop would be tough to get off the shaft, so I started drenching it in PB Blaster. I also removed the castle nut and about a 1/2" stack of clear plastic shims that had been cut out of sour cream containers (or something similar) to fill the gap between the aft end of the prop hub and the castle nut. A slipshod installation, to be sure.

I whacked the prop with a piece of wood a few days later, and it slid right off the shaft. It was clear that it was a poor fit: the key didn't fit tightly in the slot and had slightly rounded the edges of the keyway. That'll have to be taken care of upon reassembly.

With all the connections to the engine removed, the engine was ready to come out. My cousin has moved to the area for college, so he gave me a hand with that today. We rigged up a 2x4 with some chain and a come-along above the companionway and lifted the engine clear of its mounts, setting it on the cabin floor. From there it was, of course, up to the bridge deck and then over the side. I reinforced the boat shed bows and used them as lifting points for the come-along. Once over the side, the engine was lowered into a wheel barrow and deposited in the garage. Ryan was kind enough to take a few photos of the process - at least part of it.

PhotobucketPhotobucket
Photobucket

Sunday, November 20, 2011

Getting things moving

I went to the local Family Farm and Home and picked up four 5"x8' red pine fence posts to use as rollers for the boat. I needed to move it forward a bit to get it under the new boat shed. It worked like a charm. Here are a few pics.

Photobucket
Here's how far it was sticking out of the shed.

Photobucket
Placing the posts with a 4-ton floor jack.


Photobucket
All of the posts placed and the boat resting on them.


Photobucket
My trusty old Land Cruiser acting as the anchor. Using a tow strap and a come-along to move the boat.


Photobucket
Almost there.


Photobucket
Tucked inside.

In all only 5' or so of moving forward. It would have been easy to keep on going, though. The transition from asphalt to gravel drive did require some plywood bases to aid the rolling, but otherwise it was a cinch.

Now to get the cover on.

Wednesday, November 16, 2011

Picking Up (5 years later!)

It's tough to come back to a project after it has languished. Not so much because it isn't fun getting back to work, but because the inner-cynic does a good job of tempering my enthusiasm. At any rate, I'll be returning to the project as time allows.

The most exciting news at this point is that I've acquired a boat shed. My boys and I got it mostly assembled the other day, and tomorrow we'll finish it up and see what we can do to get the Alberg 30 tucked inside. Currently the boat is hanging about 6' past the rear of the shed, and although I could move the shed to accommodate the boat, doing so would make it very tough to get the cars out of the garage. The plan for tomorrow is to move the boat by rolling it atop round fence posts. We'll see if that works. Once the boat's tucked inside, I'll buy a couple of tarps to cover the shed. It'll be nice to have a structure that doesn't need constant tending during the winter like the old ridge pole and tarp setup.

Recently, I made the decision to remove the Westerbeke diesel to rebuild the beds and, while it is out, allow access to the bilge area. During the re-power - long before I owned the boat - the installer bolted angle iron tabs to the existing engine bed. The installation qualifies as a "quick-n-dirty," the old Atomic 4 beds not sufficiently designed for the narrower Westerbeke. Beyond that, the angle iron tabs aren't properly aligned, so one flexible mount is actually forced off at an angle to meet up with the engine-mounted tab. I've already removed the prop and shaft coupling, so the engine's ready to come out as soon as I rig up a hoist.

Monday, November 20, 2006

No, not pictures of the woodwork

Somehow the days have slipped into weeks and the weeks into months, and I have yet to make any real progress toward rebuilding the interior. I've thought about it many times, and though thought ought to precede action, the action part isn't always guaranteed, the exigencies of life too often diverting my attention. So there she sits, waiting for me to continue the work. And now with winter rapidly approaching, the falling mercury forces me to acknowledge that it's unlikely I'll be able to get anything done until the spring. And so, another year has come and gone, and I have little to show for it.
Despite the lack of progress, I am not dispirited. In a sort of backward postmodern way (is that redundant?), I undertook the Alberg 30 project as a kind of Thoreauvian exercise: I wanted to live deliberately and so - here's where it gets really backwards - I complicated my life with the dream of restoring a classic sailboat so that I wouldn't come to the end of my life only to discover that I had never truly lived. Does that make sense? (In keeping with the postmodern attitude: It doesn't matter if it makes sense because it does to me.) Restoring the boat is a genuine living experience. There's a clarity and peacefulness that comes from spending a few hours working with my hands while my mind is free to wander.
So, rather than dragging my barn behind me, I've found a more modern and romantic way of doing penance. Of course I'd like to make progress, but I am not at all inclined to flagellate myself for my slow progress. It's a process, and I intend to enjoy every day of my stay in the woods.

Thursday, April 20, 2006

Woodwork

It's hardly a priority, but sometimes I get distracted. Since I removed the boat cover about a week ago I've been watching the laminated strips of wood on the companionway hatch slowly peel loose and curl upwards. Well, the other day I decided that it would be wise to get the loose strips epoxied back in place and, while I'm at it, refinish the whole thing before it gets so bad that it has to be rebuilt. So, after I mixed up some slightly thickened epoxy - apparently I'm still on an epoxy kick - I carefully pried back the pieces, dribbled epoxy in the gap, and clamped things down good and tight. That was about a week ago. Today I slapped some 60 grit on the palm sander and went at the nasty, flaking finish. Perhaps an hour later, I had the lid completely sanded and looking quite nice. The next task will be to make a new vertical face to replace the aft end of the hatch that has a nasty split in it. After that's done, I'm thinking I'll cover the whole thing with a thin piece of fiberglass cloth, rather than just varnishing it, in the hope that the fiberglass will prevent water ingress in the future. I'll add some pictures when I can.

Monday, April 17, 2006

Bulkhead prep and reinforcing the engine mount

Well, I learned a new skill today: I finally got a start on some fiberglass work. Without any real plans for major work on Tradewinds, I decided to spend a few minutes reinforcing the fiberglass bed the engine is mounted to. I'd noticed while taking things apart that the two forward edges of the bed looked like they could benefit from being tabbed to the hull. Whether they were tabbed once upon a time or not I couldn't tell, but certainly adding some tabbing would strengthen things up and give me a chance to practice the process.
I had previously ground the area down to fiberglass, so I wiped the engine bed and surrounding hull with acetone, then mixed up some West System epoxy thickened with colloidal silica. I created a fillet that filled a small gap under the bed and provided a smooth transition between the bed and hull, then I applied the tabbing. I cut a couple 4" lengths of tape, wet them out, then began smoothing them into place. After the 4" pieces, I added some 6" pieces with a cut or two to allow the tabbing to lay naturally along the bed and hull. All in all things went together quite well. In fact, I rather enjoyed the process and now I'm anxious to move on to the bulkheads. When I get some more time, I'll sand the area and add a couple more strips of tabbing just to make sure things are good and stout. I'll also trim the fiberglass that ran off the edges of the bed.


Port side of the fiberglass bed.


I also added a fillet to the starboard side of the bed, but didn't have time to tab it.

After I'd tabbed the engine bed, I was kind of hooked on progress so I mixed up more thickened epoxy and filled the gaps between the tabbing where I'd removed the bulkheads. When I get back at things, I'll sand those areas smooth and begin measuring for my bulkheads.


I'm still trying to decide exactly how to tackle the chainplate knee. It was originally tabbed to the shelf in the hanging locker as well as the adjacent hull, so I'll certainly tab it back to the shelf when I get things together, but since I've done so much grinding in that area I'm thinking that I ought to add a couple layers of tabbing to the hull, too. The only problem is that the space will be very confined once I reinstall the bulkhead, and adding more tabbing (if it were done over the whole knee) will mess up the chainplate alignment. So, my options are to simply tab it back to the shelf and quit there, or tab it on the aft side only so added glass won't affect the chainplate's alignment, which would involve removing the bolts, adding the tabbing, redrilling the holes, and bolting things back together. Probably the best plan.


Sunday, April 09, 2006

Das new grindermaschine

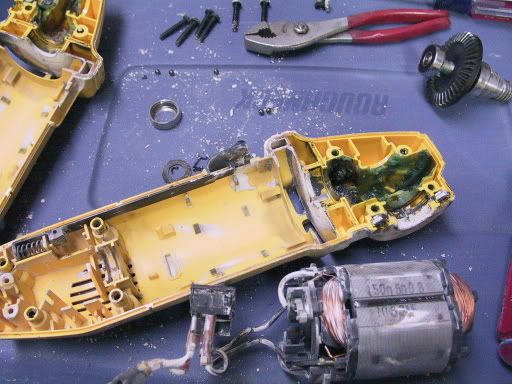
So I dissected the DeWalt angle grinder and the postmortem revealed a blown apart bearing. A trip to Lowe's in search of a replacement bearing turned up nothing (big surprise!), so I went ahead and forked out $50 from the boat fund to buy a Hitachi. Why the Hitachi? Because the DeWalt was $89 - and I don't have that much mileage on the one that died. Also, I found a place on the internet that sells the DeWalt replacement bearing for $8. I'll order that, get the DeWalt working again, and keep it for backup.


By the time I'd returned home from Lowe's I only had about two hours to spend on Tradewinds, so I went to work with my new grinder and 36 grit flapper wheel - what a beaut! That flapper wheel makes all the difference: it makes short work of the paint without removing too much fiberglass. In fact, the thing works so well, I'm nearly done with all of the grinding. All I have left are a few tough spots around the chainplates that still need tabbing cut/ground out and I'm ready to give the interior a good cleaning and wipedown and begin the bulkhead installation.
With bulkhead work around the corner, I'll need to get two sheets of Okume to use between the saloon and head compartment and hanging locker. I already have two sheets of furniture grade oak that I'm using for such non-structural parts as the settee, nav station/ice box, and engine compartment.
In other news, the Tyvek suit finally went into the trash today. It was a good run, but it's time to buy another.
And in yet more other news, although I'm completely thrilled with the work involved in restoring Tradewinds, there are times when I look around and ask myself, "Where will it end?!" And I'm not talking about rebuilding the interior, that was (more or less) the plan from the beginning. I'm talking about all those little things that I'd like to change, the things I'd do differently if it were my boat, THE boat and not just a project. There has to be a line, though. The problem is that I'm always trying to figure out exactly where that line is. Is it before or after that bilge pump thru hull that should have been located on the transom? Or what about reconfiguring the v-berth to accommodate a water tank? Or repainting the bootstripe? Or resurfacing the cabin sole? The fact that it's so easy to fall in love with a boat like this makes things that much more complicated. I suppose it's only natural to want to see her functional, updated, glistening - everything a classic Alberg design ought to be.
And so I wait and evaluate as work continues. The hours of grinding offer me a chance to plan and consider just what must be done and what should be left to her new owner as they too become a part of the dream.

Friday, April 07, 2006

Das grinder es kaput!

After chiseling out the remains of the starboard bulkhead from between the tabbing, I decided to try out a flapper wheel on the grinder in the hope that it would make short work of the prep work for tabbing in the new bulkheads. Sure enough, it worked great...that is, until the grinder decided to pack it in. It began signaling its demise by varying rpm, a faint odor of burning electrical goods, and, upon shutting it down, stopping almost immediately rather than slowly spinning to a stop. Too bad. Before I head out to buy another, though, I'm going to see if I can't resurrect this one.
I was tempted to quit for the day since the plan was to get all the grinding done, but I decided that as long as I was all suited up I might as well clean things up - the fiberglass dust was so thick tools were beginning to disappear. I filled the trash can with pieces of bulkhead, shelving, and fiberglass tabbing, then gave the interior a good vacuuming. After all that, I hosed down the decks to get rid of leaves and pine needles that had collected along the toe rail and in the cockpit.
Sunday I'll get back to grinding - either with a new grinder or the old one resurrected.

Cleaning up.

Monday, April 03, 2006

The horror. The horror.

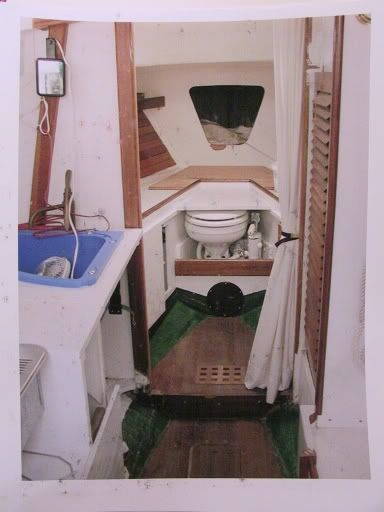
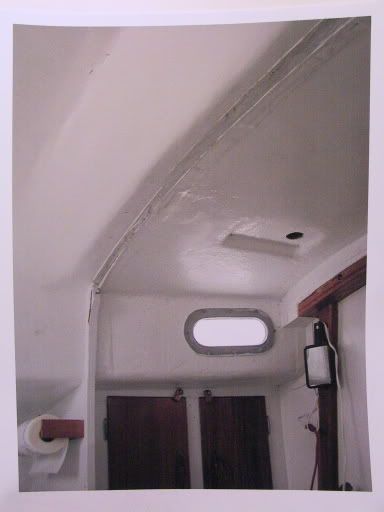
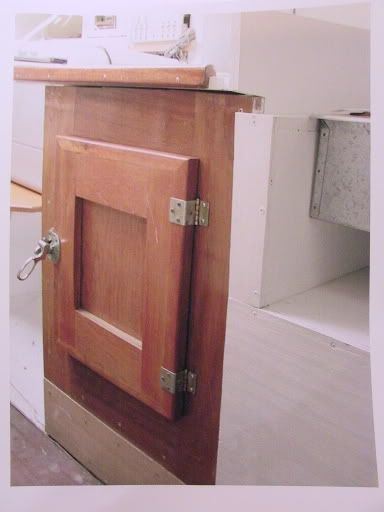
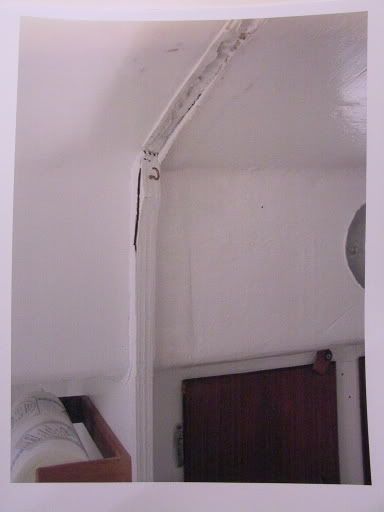
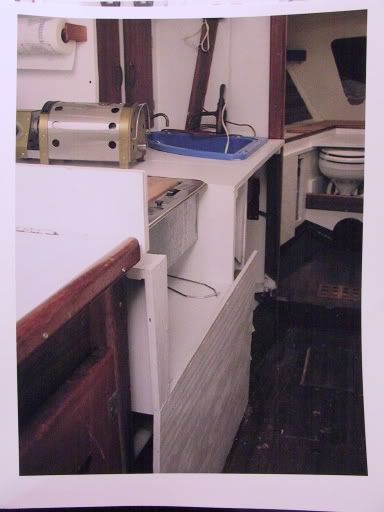
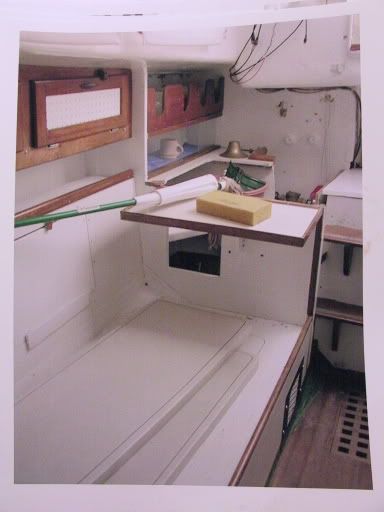
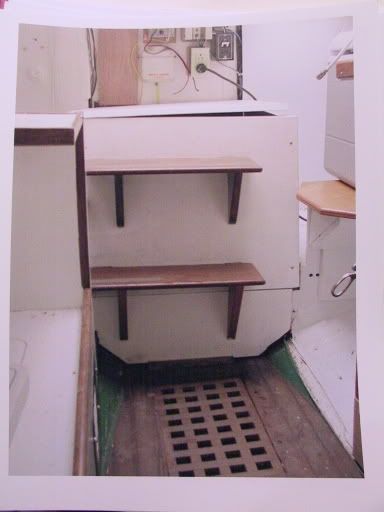
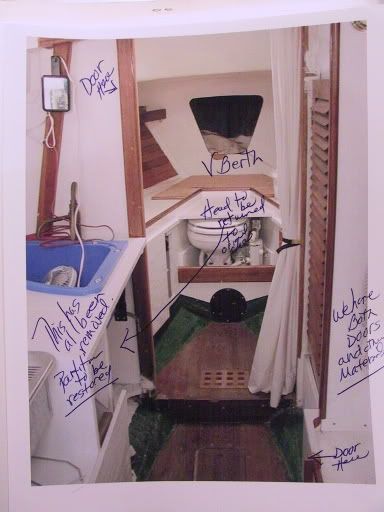
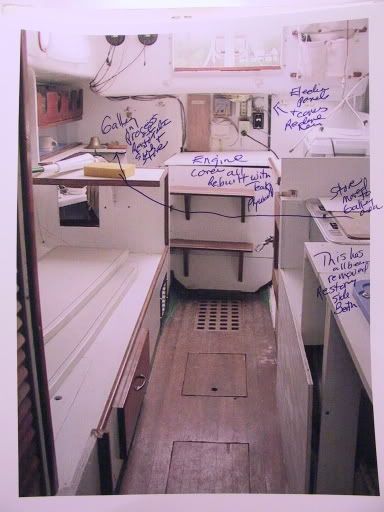
Among the stacks of stuff I got with the boat I found some photos of a previous owner's vision of what - I can only imagine - he thought the interior of a boat should look like. His philosophy must have gone something like this: 1) never let someone else's thoughtful and careful construction stand in your way; 2) when rebuilding, rely on your treehouse building skills from childhood: use only scrap lumber, put your collection of rusty salvaged nails to use, don't fret about poorly secured items (the fat kid shouldn't be climbing around your treehouse anyway!), and, most importantly, add all kinds of thingamajigs that don't serve any purpose other than looking "cool"; 3) structural integrity...who needs it?! A real boat stays at the dock anyway.
Enough of that. It truly is lamentable. I won't even try to explain the following pictures. How could one make sense of insanity?


* NOTE * The writing on the pictures is not mine. It presume it is the hopeful scribbles of a prospective owner who was assured that, prior to purchase, the previous owner's sins would be corrected.

Saturday, April 01, 2006

Still grinding away at it

This may sound crazy, but it's a real thrill to don the old Tyvek suit and full-face respirator, and go at it on Tradewinds. Although the work is terribly dusty, a bit awkward at times, and an undeniably serious undertaking, I absolutely love it. Nothing beats the feeling of tackling a task and - little by little - seeing things happen. And what's even more exciting than that is imagining the next steps: Which bulkhead will be placed first? How will I fit it, tab it? What will the interior look like as the pieces come together and she begins to assume her original layout? It's difficult to be patient; I'm anxious to move ahead to the rebuilding. Things must be done correctly, though, and that means thorough preparation, careful planning, and deliberate reconstruction.
My immediate challenge is to remove the remnants of the starboard bulkhead without damaging the adjacent settee. A Sawzall would be the tool of choice, but my boat budget can't afford to absorb that kind of expense, so I'll continue using the angle grinder and cutoff wheels. Another challenge is prepping the hull for the eventual tabbing once the bulkheads are fitted and ready for permanent installation. I've been using 40 grit on my r/o sander, but I'm going to make a trip to Lowe's to search for something more aggressive. The 40 grit just doesn't have what it takes to deal with the hull's uneveness. Tim Lackey, a yacht surveyor and restorer, used 16 grit on a similar project, so that's probably what I'm after. I suppose another alternative might be a flapper wheel (or whatever it's called) that I could use on the angle grinder. I'll see what a trip to Lowe's reveals.

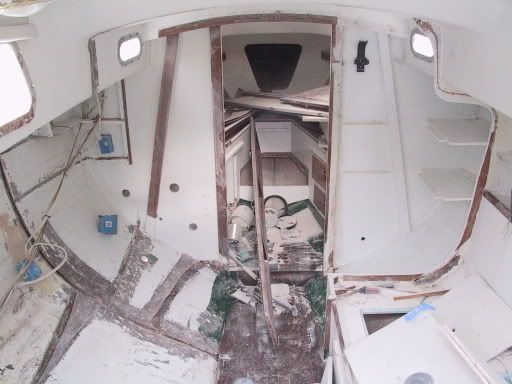
This is where I've concentrated most of my efforts thus far - port settee, bulkhead, and head compartment.

Yesterday I removed the starboard "bulkhead" that had been scabbed in to fill a p/o's Sawzall rampage. The bulkhead was attached with several screws and some adhesive to the remaining bits of the original bulkhead.

Like the port bulkhead, these remnants will be completely removed so that a new, solid bulkhead can be fitted.

The vertical line here is the location of the port bulkhead that separates the saloon from the head compartment. The horizontal line to the left is the settee bottom and back. The two lines to the right are the head cabinet and pedestal.

I had tackled this area some time in the fall. A transverse bulkhead will form the forward part of a nav table and ice box. Storage shelves and bins will be located along the outboard edge.

One of two thruhulls that I removed yesterday. This one will be glassed over.

The junction of the settee back and bottom.

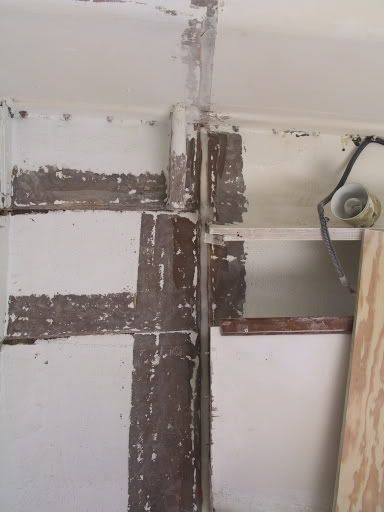
This is where the port bulkhead meets the overhead.

The two thruhull locations are visible here. The upper hole will be glassed over. The lower hole will be used for raw water intake to flush the head. Lake Michigan waters are "no discharge", so there will be no accomodation for overboard discharge in the system.

The aftermost chainplate tied into the tabbing for a shelf in the head compartment. For safety's sake, I will replace the shelf during the rebuild and add a few extra layers of fiberglass just to ensure an extra stout attachment.

Thursday, March 23, 2006

Back at it...finally

It's been awhile since I spent time working on the Alberg, and it felt good to finally get back to it today. The exigencies of life have kept me away from the project for far too long.

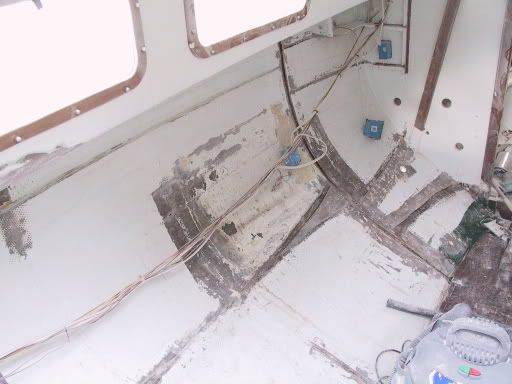
My goal for the day was to finish all of the grinding so that I can put that mess behind me. During my last effort I managed to remove the remnants of the ice box bulkhead and grind the area smooth. Today I moved on to the settee and port bulkhead that separates the saloon from the head. I feel like I made pretty good progress for about 3 hours worth of work. The biggest challenge was the bulkhead. Unfortunately I couldn't remove it without also removing the cabinet in the head, which, of course, meant removing the shelves and wiring. I still have a bit of grinding left to do. Specifically, I still need to grind out the remnants of the floor the head was mounted to; cut away the tabbing that held the shelves in place; and remove a bit of tabbing that held the shelf above the port settee in place. All in all, not too much. I'll be happy to be done with the dust! I'm absolutely amazed at how much dust the grinding produces; I'm going to be vacuuming it out for months!


More or less the way things looked when I started.


The port bulkhead that separated the main cabin from the head. Notice a previous owner's attempt to "fix" the space that yet another previous owner carved out. Scary.


What the space looks like now.
After all the grinding and sanding is finished, the next step will be to clean the area well and fill the gaps between the tabbing remnants with epoxy, fair, and begin installing the bulkheads, settee, shelves, etc. I can't wait until I'm ready for that step. Far more fun than this grinding nonsense. And this time I'm not making any predictions as to when I'll be ready to do that. I'll just say, as soon as I can.