There were a couple tasks that I wanted to get done: 1) clean out the bilge and seal the exposed cement (or whatever it is) that fills the area at the aft end of the bilge; 2) remove the ridiculous web of wiring and the offensive Celebrity ski boat electrical panel; 3) remove the old engine mounts in preparation for new engine beds.
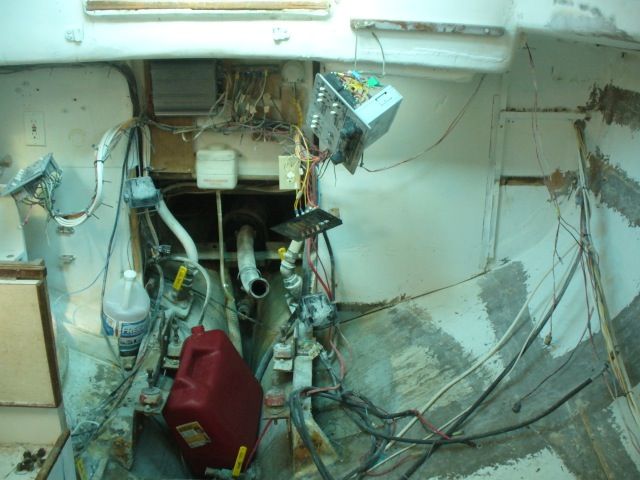
Here you can see the DC panel with stereo and a dangling cheap-o accessory panel hanging to port, and the AC panel to starboard. At the center are several blocks of wood (secured with a dozen or more screws through the cockpit footwell) to which are fastened an amp for the stereo and a buss or two.
I began by stripping all the bits and pieces of wiring out of the boat. Most of the wiring is newer, so I did what I could to preserve lengths of wire that I might be able to reuse. I am amazed that the PO thought it was necessary to have five separate AC outlets located within such a small cabin. Ariel, our CD36, has three AC outlets, and never have we wanted for more. Of course, the number of outlets in the A30 should come as no surprise given all the other "improvements."
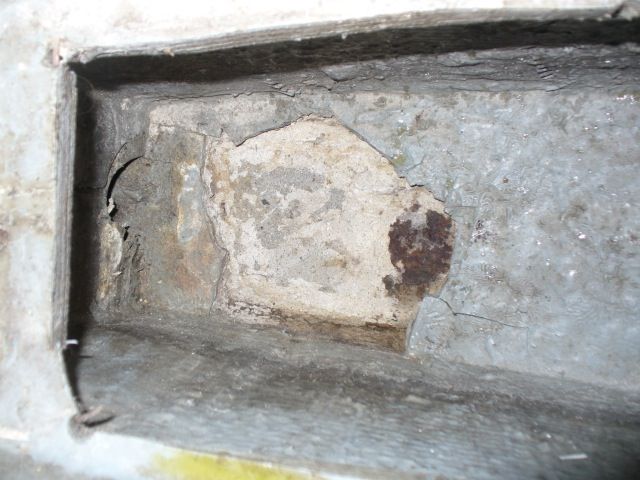
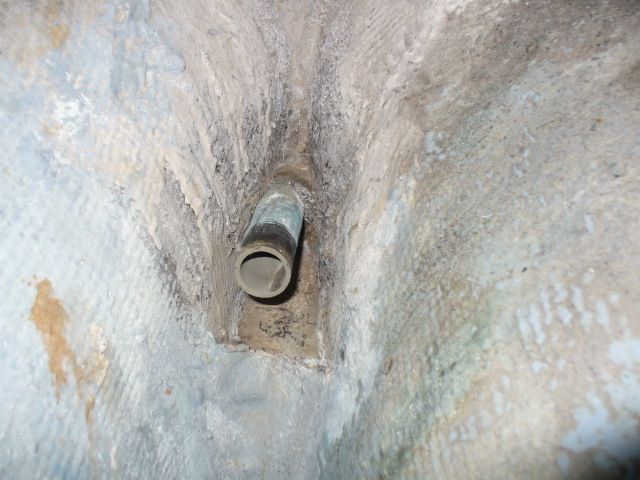
With all the wiring stripped out of the boat and organized, I cleaned up the area and vacuumed out the bilge. In the area just forward of the aftermost floor, there was a piece of exposed ballast and aft of it a cement-like material intended, I suppose, to keep the ballast in place and the fill the aft area of the keel.
 |
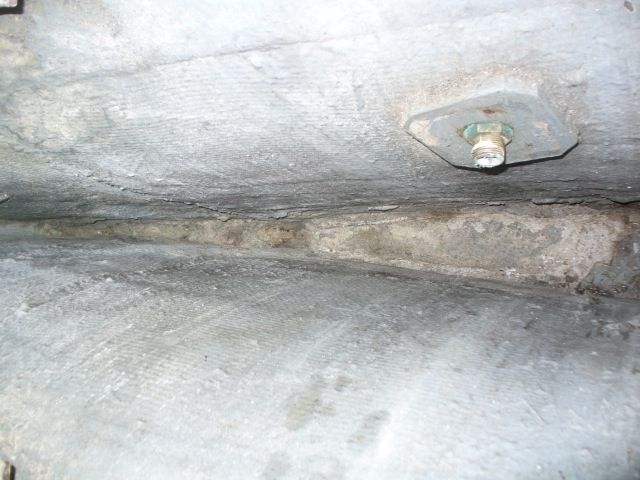
| The rusted area of exposed ballast is visible at right. |
Water had apparently leaked through this area for some time because a previous owner installed a drain in the bottom of the keel just aft of this position. Once I'd vacuumed the junk out of the bilge, I noticed a hole had been drilled down through the cement, and after rodding it out with a screw driver I was able to see through to the drain in the keel. I'm not too keen on having a exposed fitting mounted to the bottom of the keel where it could be damaged or ripped loose in a grounding, so I will eventually remove it and install a garboard drain even with the bilge bottom.
 |
| After portion of the bilge showing the exposed material. |
I mixed up some epoxy and applied a thin coating over the exposed material in the keel as an initial seal. Once it was tacky, I mixed up epoxy thickened with colloidal silica and used it to fill in some of the larger gaps. Atop that I laid a layer of fiberglass cloth. Although that provided some measure of protection to that area, it left an irregularly shaped bilge, so I cut a couple pieces of blue DOW styrofoam board to fit and fill the bottom of the bilge, creating a flat surface that sloped slightly forward from the aft portion of the bilge. Eventually that foam board will receive a layer of 1708 biaxial cloth that will become the new bilge bottom, sealing the area beneath.
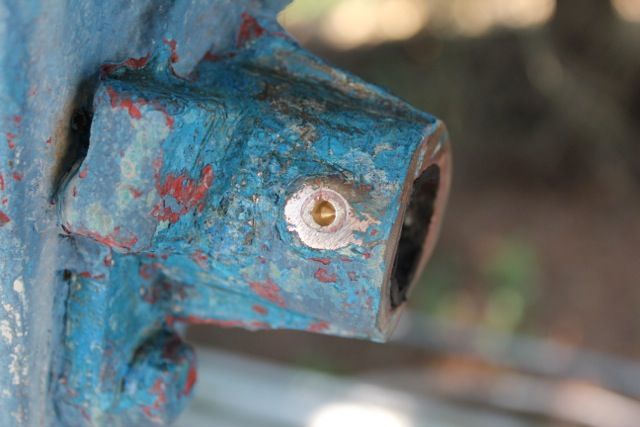
It was too hot to continue work in the boat, so I turned my attention to removing the old, worn cutless bearing as part of prepping for reinstalling the engine. The cutless bearing housing screws onto the molded-in stern tube. Removal requires removing the two bolts that are threaded into the keel deadwood, then unscrewing the cutless bearing housing. Unfortunately, it appears that I may have partially "unscrewed" the stern tube as I was attempting to remove the housing.
The two bolts that secure the housing are visible in the photo to the left. The aftermost portion of the housing also shows the cutless bearing sleeve pressed into the housing. In this case, it is also evident that a previous owner got a little carried away with a grinder or reciprocating saw and cut the housing and the bearing - presumably because the bearing stood proud of the housing. Why they didn't just cut the bearing flush without damaging the housing is a mystery.
Two set screws on either side of the housing are used to lock the cutless bearing in place. I was able to remove the starboard screw easily, but the port screw crumbled when I tried to turn it.
While I was operating under the delusion of removing the cutless bearing with the housing still attached to the boat, I decided to drill out the set screw - visible at left. Even with both set screws removed, there was no easy way to remove the cutless bearing. I even tried cutting some reliefs in the bearing sleeve, but there was no way to pry it loose without damaging the housing further.
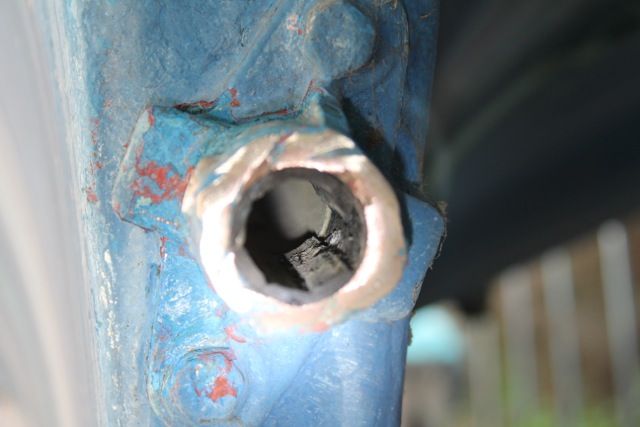
The threaded portion of the stern tube that attaches to the bearing housing is visible where a portion of the rubber bearing has been removed.
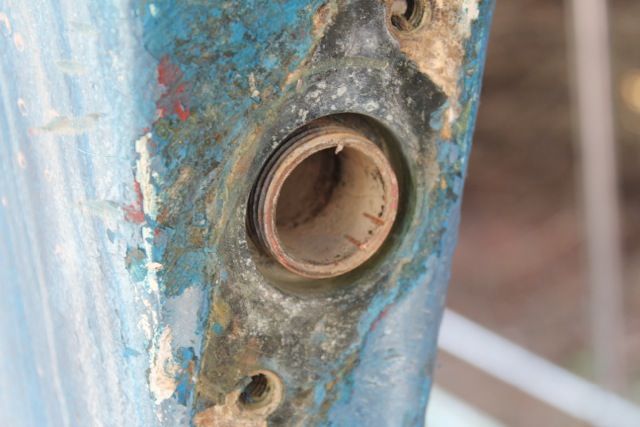
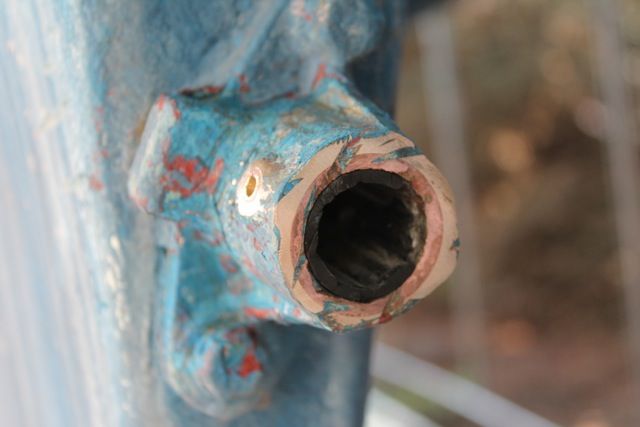
And here is the threaded stern tube with the bearing housing removed. Since I fear the stern tube "unscrewed" partially during removal of the housing, the next step is to remove the stern tube and prepare it and the housing, with a new cutless bearing, for reinstallation in a bed of sealant. The important bit is to ensure that all of these bits line up well with the new engine mounts, etc. That process is something I've only read about, so I'll be feeling my way along - carefully.
Timing for all of this has worked out quite well since Jimmy of SV Cookie is working through some of the same issues. I've already sought his input on some of this and appreciate his contributions.
 |
| The stern tube |
Timing for all of this has worked out quite well since Jimmy of SV Cookie is working through some of the same issues. I've already sought his input on some of this and appreciate his contributions.
1 comment:
I noticed some things that are different about your boat compared to mine! And beware: I am no expert! Just a guy with a dream and a lot of time on his hands!
It is good to see that you are blogging your exploits and experiences again.
Post a Comment